如果看了《阿凡达》不写点什么,是否都会被人鄙视一番?
一部《阿》剧惊动了多少人啊。听说首映当天有人开车到上海来看完后,再连夜赶车回南京。也不知道是真是假 。
反正首映结束后,第二天网上一些网站的《阿》剧专题里就有人说:看2D《阿》剧,和看枪版没啥区别。
如果不是正好周四单位放假,我恐怕也没有时间去看吧。。所以看完后,今天就想着要写一点东西了。
《阿》剧在中国人看来没有啥内涵,其实也很正常,如今的网络小说,什么穿越、重生、未来、异世、修真等,自然看起来没啥内涵。。twocold说强拆的事情在我们看来是天经地义的,唯有老外(包括外星人)想不通了。
看看这个傅红雪写的《阿凡达》里反应出来的装修问题,也算是真能看的。
我是没有看出这些东西,我只是觉得在两个镜头的时候震撼了一下,一个是阿凡达刚刚进入森林时,从高处往 下看时,还有一个就是刚刚乘上大鸟在飞翔时,我这个有恐高症 的人立刻有很大的震撼了。这是以往 看2D电影所没有的感觉 ,也是从来未有过的。。
场景,是这部电影最让人震撼的,再加上3D效果,十年一剑,果然非常强悍,一时国内影评纷纷认为,差距巨大。距离相差几十年也有吧。一同事说,不是几十年能够达到的,还是用光年做比较才行。。
其实仔细想想,泰坦尼克号的3D国内至今 也没有能够完全实现过。当时所谓最顶级的3D效果也就是把。。。
不过我老婆看完后说的却是:怎么主角都是叫杰克?

 膘叔的简单人生 , 腾讯云RDS购买 | 超便宜的Vultr , 免费部署 N8N 的 Zeabur
注册 | 登陆
膘叔的简单人生 , 腾讯云RDS购买 | 超便宜的Vultr , 免费部署 N8N 的 Zeabur
注册 | 登陆
浏览模式: 标准 | 列表2026年07月的文章
乱弹
Submitted by gouki on 2010, January 8, 9:52 PM
来自淘宝UED的手机网站开发必修课[2009总结版]
Submitted by gouki on 2010, January 8, 11:56 AM
因为自己的手机是G2,所以对于这方面的就稍关注了一点点。本想也想做个手机软件下载站,但不是官方一来无法收集全所有的程序,二来也没有什么市场软件提供。不能够精简流量。所以也就短暂的放弃了这个想法。
看到UED的关于手机开发网站的必修课。所以先记录一下。
以下是内容,很长哦。。。慢慢看,来自手机网站开发必修课[2009总结版],原文中还有一幅进化图:
从09年初接手淘宝手机网站前端开发的工作至今,转眼已是一年。一步步看着手机淘宝从最初的beta版本到今天的样子,感慨良多。
手机网站开发,有着许多不为人知的困难:
一是可参考的资料太少,大部分手机网站都处于起步阶段,很多的时候都是摸着石头过河,而鉴于淘宝自身的特殊性,也使得我们在参考成功案例之余,要做更多的思考;
二是兼容性工作异常艰辛,难度一点也不比web网站的兼容性工作来的低(关于这点,请参见我之前的文章);
再者作为一个手机网站的前端开发,也往往容易被人忽视(包括我们自己),大家也许会觉得做好一个手机网站能有多难,了解一点XHTML、一点 CSS,甚至不需要对JavaScript有什么研究,事实却不是如此,正因为手机网站的开发受到设备的太多限制,前端们常常为了节约几个字节而纠结万 分,写出语义化良好的代码也显得更加重要,而多版本的开发需求也对于JavaScript的优雅降级要求甚高,这样才能使得网站有分版本需求的时候可以公 用同一套XHTML代码,最大程度的降低开发成本。
对于手机网站来说,相信现在仅仅只是个开始,随着各种新机型的相继面世,这块领域必将成为兵家必争的新高地。
注意:由于手机网站发展迅速,请参阅者注意本篇文章的发布时间。
目录
- 手机用户设备统计分析
- 手机浏览器兼容性测试结果概要
- 手机网站开发中你需要注意的问题
- 推荐参考资料
- 总结
![]()
手机用户设备统计分析
拥有全面的用户数据,无疑能帮助我们做出更符合用户需求的产品。内部数据能帮我们精确了解我们的目标用户群的特征;而外部数据能告诉我们大环境下的手机用户状况,并且能在内部数据不够充分的时候给予我们一些非常有用的信息。
从外部数据来看,09年10月到11月期间
国内浏览器品牌市场占有率前三甲为:
- Nokia(78%)
- Opera(OEM) (10%)
- iPhone(Safari) (3%)
国内的手机操作系统前三甲为:
- Nokia SymbianOS(80%)
- iPhoneOS(6%)
- SonyEricsson(5%)
当然,作为中国的手机网站开发者,不能忽视强大的山寨机市场(或者应该叫作做国货精品手机市场?)。顺便提一下,这类手机通常使用的是MTK操作系统。
(以上数据均来自statcounter.com)
手机浏览器兼容性测试结果概要
注意:以下所说的“大多数”是指在我们测试过的机型中,发生此类状况的手机占比达50%及以上,“部分”为20%到50%;“少数”为20%及以下。而这个概率也仅仅只限于我们所测试过的机型,虽然我们采集的样本尽量覆盖各种特征的手机,但并不代表所有手机的情况。
XHTML部分
大多数手机不支持的:
- 表单元素的“disable”属性
部分手机不支持的:
- “button”标签
- “input[type=file]“标签
- “iframe”标签。
虽然只有部分手机不支持这几个标签,但因为这些标签在页面中往往具有非常重要的功能,所以属于高危标签,要谨慎使用。
少数手机不支持的:
- “select”标签:该标签如果被赋予比较复杂的CSS属性,可能会导致显示不正常,比如”vertical-align:middle”。
CSS部分
大部分手机不支持的:
- “font-family”属性:因为手机基本上只安装了宋体这一种中文字体;
- “font-family:bold;”:对中文字符无效,但一般对英文字符是有效的;
- “font-style: italic;”:同上;
- “font-size”属性:比如12px的中文和14px的中文看起来一样大,当字符大小为18px的时候你也许能看出来一些区别;
- “white-space/word-wrap”属性:无法设置强制换行,所以当你网页有很多中文的时候,需要特别关注不要让过多连写的英文字符撑开页面;
- “background-position”属性:但背景图片的其他属性设定是支持的;
- “position”属性;
- “overflow”属性;
- “display”属性;
- “min-height”和”min-weidth”属性;
部分手机不支持的:
- “height”属性:对”height”的支持不太好,奇怪的是在我们的测试当中,仅仅只有很少部分手机不支持”width”属性;
- “pading”属性
- “margin”属性:更高比例的手机不支持”margin”的负值。
少数手机不支持的:
- 少数手机对CSS完全不支持;
JavaScript部分
这部分测试相对不那么让人抓狂,要么干脆不支持,如果支持的话,对基本的dom操作、事件等支持度都还不错。但我们没有测试过很复杂的脚本。
在我们测试过的手机当中,支持(包括不完全支持)JavaScript的手机比例大约在一半左右,当然,对于我们来说,最重要的不是这个比例,而是要如何做好JavaScript的优雅降级。
其他
- 部分手机不支持png8和png24,所以尽量使用jpg和gif的图片
- 另外对于平滑的渐变等精细的图片细节,部分手机的色彩支持度并不能达到要求,所以慎用有平滑渐变的bar设计
- 部分手机对于超大图片,既不进行缩放,也不显示横下滚动条
- 少数手机在打开超过20k的测试页面时,会显示内存不足
开发中你需要注意的问题
- 手机网页编码需要遵循什么规范?
遵循XHTML Mobile Profile规范(WAP-277-XHTMLMP-20011029-a.pdf),简称为XHTML MP,也就是通常说的WAP2.0规范。 XHTMLMP 是为不支持XHTML的全部特性且资源有限的客户端所设计的。它以XHTML Basic为基础,加入了一些来自XHTML 1.0的元素和属性。这些内容包括一些其他元素和对内部样式表的支持。和XHTML Basic相同,XHTML MP是严格的XHTML 1.0子集。 - 网页文档推荐使用扩展名?
推荐命名为xhtml,按WAP2.0的规范标准写成html/htm等也是可以的。但少数手机对html支持的不好。 - 为什么现今大多数的网站一行字数上限为14个中文字符?
由于手持设备的特殊性,其页面中实际文字大小未必是我们在CSS中设定的文字大小,尤其是在第三方浏览器中。例如Nokia5310,其内置浏览器 页面内文字大小与CSS设定相符,但是第三方浏览器OperaMini与UCWEB页面内文字大小却大于CSS设定。经测试,其文本大概在16px左右。 假如屏幕分辨率宽度为240px,去除外边距,那么其一行显示14个字以内,是比较保险(避免文本换行)的做法。 - 使用WCSS还是CSS?
WCSS (WAP Cascading Style Sheet 或称 WAP CSS)是移动版本的CSS样式表。它是CSS2的一个子集,去掉了一些不适于移动互联网特性的属性,并加入一些具有WAP特性的扩展(如-wap- input-format/-wap-input-required/display:-wap-marquee等)。 需要留意的是,这些特殊的属性扩展并不是很实用,所以在实际的项目开发当中,不推荐使用WCSS特有的属性。 - 避免空值属性
如果属性值为空,在web页面中是完全没有问题的,但是在大部分手机网页上会报错。 - 网页大小限制
建议低版本页面不超过15k,高版本页面不超过60k。 - 用手机模拟器和第三方手机浏览器的在线模拟器来测试页面是不是靠谱?
有条件的话,我们当然建议在手机实体上进行测试,因为目标客户群的手机设备总是在不断变化的,这些手机模拟器通常不能完全正确的模拟页面在手机上的显示情 况,比如图片色彩,页面大小限制等就很难再模拟器上测试出来。当然,一些第三方手机浏览器的在线模拟器还是可以进行测试的,第三方浏览器相对来说受手机设 备的影响较小。
推荐参考资料
开发权威网站
- WAPForum:XHTML Mobile Profile规范.pdf
- WAPForum:WCSS规范.pdf
- W3C:XHTML Basic 1.1规范.html
- W3C:Mobile Web Test Suites Working Group.html
- PPK:关于手机浏览器兼容性的测试和研究.html
- Developershome:XHTML MP 教程.html (汉化版)
经典开发文章
- Unknown:移动WAP相关标记语言的演进.jpg
- Flora Graham:Alternative mobile browsers tested.html
- Lucas Pettinati(Yahoo):Challenges of Interface Design for Mobile Devices.html
- Holly Kolman:How to Make a Click to Call Link.html
- Brian Suda:Introduction to the Mobile Web.html
手机型号查询
- handsetdetection:手机查询.html 机型很全,偏国外机型,参数较多
- mobile9:手机查询.html 机型较全,偏门机型可能无内容
- 试手机网:手机查询+模拟.html 机型稍少,可以模拟手机操作
总结
目前来说,手机网站开发是个典型的设备驱动开发的过程,页面被设计成什么样,能做到怎么样,几乎全取决于目标客户的手机设备情况。
所以,对手机设备的了解,对于设计开发过程有着直观重要的作用,对于前端来说,就需要有计划的进行长期的手机浏览器兼容性测试,什么样的设计能被实现,什么样的标签可以使用,这些都需要有数据的支持。
我们必须有这样的认知,开发的手机网页总是会在或多或少的手机设备上出现问题,因为我们永远无法知道所有用户的手机设备情况,所以我们更要尽量的遵循标准进行开发,这样才能将满足用户的比例做到最好。
任何一个领域都有值得你进行深入了解的地方,即使现在看起来,手机网站的开发还有点不入主流,但我相信,随着手机设备的更新换代,总有一天它也会成为我们占领客户的一个重要战场,iphone这类有符合web标准的浏览器的手机发布,也给了我们更多的信心。
总之,革命尚未成功,同志仍需努力。顺祝大家新年快乐!
使用PHPRPC时的一点点郁闷 。。
Submitted by gouki on 2010, January 7, 3:24 PM
不想多说啥。。。随便上代码 。。【include的时候是伪代码】
PHP代码
- include(phprc)
- include(classfile);
- if(isset($_SESSION['t'])){
- $_SESSION['t'] = new classfile;
- }
- $server = new phprpcserver;
- $server->add($_SESSION['t']);
- $server->start();
不正常。。。如果把上面代码的第1、2行颠倒一下就行了。即:
PHP代码
- include(classfile);
- include(phprc);
OK,一切正常了。开始没发现。因为官方的例子是把测试用例写在同一个文件里。。所以一点问题都没有。。
郁闷了整整一天
UserAgent分析
Submitted by gouki on 2010, January 6, 1:10 PM
本文并不是教你怎么分析,事实上,分析UserAgent也是一件很简单的事情,正则以空格分开,后前没有标点,就行了。。
不过,想要知道UserAgent里那么多的参数代表了什么意思,那还是一件挺复杂的事情,这不,有个网站就做了这样的事情,Look:http://www.useragentstring.com/
你会看到Useragent的分析报告 。。。
【
对于一般用户来说,他们是不会修改UserAgent的,但是对于经常混迹于互联网的你来说,一定要学会修改,呵呵,Firefox就有插件:Nightly Tester Tools
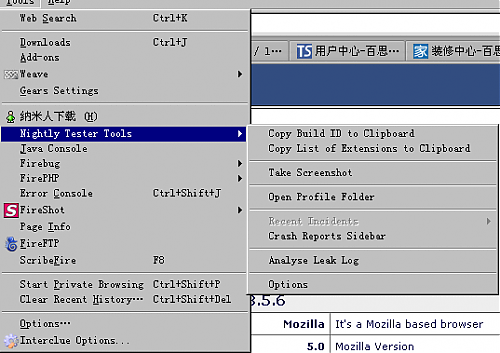
】
事实再一次证明,创意远比技术来得重要。。。
网易免费邮箱(163、126)重新免费开放POP/SMTP服务
Submitted by gouki on 2010, January 6, 10:21 AM
其实,这个新闻里所说的:【众所周知,2006年12月之后申请的网易免费邮箱不再提供免费POP/SMTP服务】,我还真不知道。。。
我只是奇怪为什么我的帐号可以发邮件,而同事的却不能发。。毕竟我们更多的时候是用PHP来发邮件的。
原来是这样啊,http://www.cnbeta.com/articles/101483.htm:
据广大网友反映,从今天晚上20点40分开始,网易免费邮箱(163、126)再次免费开放POP/SMTP服务。众所周知,2006年12月之后 申请的网易免费邮箱不再提供免费POP/SMTP服务,不少用户因此都埋怨网易小气。可能是因为前几年稳坐国内免费邮箱头把交椅的缘故,网易一直对用户要 求免费开放POP的呼声置之不理。 这两年,随着QQ邮箱的高歌猛进,大量网易邮箱用户开始倒戈,投入QQ邮箱和gmail的怀抱,网易的免费邮箱老大哥地位也摇摇欲坠。2010年伊始,网易邮箱便展开了一些列大动作。升级到3.5版后,网友们欣喜地发现网易邮箱开始变得厚道起来,主要变现在:
1.从上个月开始, 免费邮箱去掉了发信时的广告尾巴;
2.从今天晚上20时40分开始,网易163和126免费邮箱可以免费开通POP服务。(默认未开启,用户需在邮箱设置中手动开启)
--EOF--
邮箱中,我常用的也就163和yahoo了。自从foxmail推出后,我也用了foxmail,但是现在。。。。登录却跳到了QQmail,真伤心。。。139邮箱也在用,不过。纯粹是为了免费提醒功能。可以让我收到一些提醒信息。。
163一改版,我就立马发现了。确实顺手,而且速度也很快
| « 2026年07月 » | ||||||
| 日 | 一 | 二 | 三 | 四 | 五 | 六 |
|---|---|---|---|---|---|---|
| 1 | 2 | 3 | 4 | |||
| 5 | 6 | 7 | 8 | 9 | 10 | 11 |
| 12 | 13 | 14 | 15 | 16 | 17 | 18 |
| 19 | 20 | 21 | 22 | 23 | 24 | 25 |
| 26 | 27 | 28 | 29 | 30 | 31 | |
日志分类
- PHP [668]
- python [0]
- Go [9]
- Flutter [227]
- lua [0]
- Scala & Ruby [92]
- Javascript [307]
- PHP Framework [65]
- Linux [5]
- 苹果相关 [286]
- DataBase [0]
- Software [236]
- Literature [9]
- Ideas [27]
- 產品 [14]
- Misc [981]
- Baby [161]
热门标签
-
mysql
php
jquery
yii
ubuntu
google
linux
javascript
firefox
肖佑阳
framework
phpstorm
database
mac
thinkphp
svn
apache
zend
typecho
wordpress
qq
连载
seo
chrome
优化
ipad
netbeans
ios
css
架构
日志归档
搜索文章
最新评论
- 前几年 lnmp.org 被收购,搞了一波投毒之后,我对这种一键...
06-03 - imlonghao - 这是默认主题啊,怎么分享
10-18 - gouki - 请问这个主题可以分享一下么 谢谢
10-14 - NN - 大佬你好,在用dcat 遇到 怎么做无感刷新的问题,请问你有做过...
02-01 - uc5bbl8s - 好用!!
07-14 - 口水
博客信息
- 分类数量: 17
- 文章数量: 3152
- 评论数量: 1906
- 标签数量: 2284
- 附件数量: 941
- 注册用户: 56
- 今日访问: 42766
- 总访问量: 75277441
- 程序版本: 1.6
