Submitted by gouki on 2009, December 24, 12:30 PM
我曾经写过一篇很简单的笔记,是讲如何安装AMP的,当然很方便。。。,那篇文章在:http://www.neatstudio.com/show-522-1.shtml
今天我在使用了VPS后,也装了这些配置。但最后却仍然报错:
XML/HTML代码
- Could not reliably determine the server's fully qualified domain name, using 127.0.0.1 for ServerName
现在我把我的步骤列出来。并列出解决方法
1、到/var/www/下新建一个目录,例如我的 sbphp.com,新目录的路径则为 /var/www/sbphp.com/
2、到/etc/apache2/sites-available/目录下,新建一个文件,名为sbphp.com,内容如下:
XML/HTML代码
- <VirtualHost *:80>
- ServerAdmin xxx@xxx.com
- ServerName sbphp.com
- ServerAlias www.sbphp.com
- DocumentRoot /var/www/sbphp.com/
- <Directory /var/www/sbphp.com/ >
- #这行是不显示列表
- Options -Indexes
- Order Deny,Allow
- Allow from all
- </Directory>
- </VirtualHost>
3、运行:a2ensite sbphp.com
4、然后系统会提示你重载一下apache,命令为 /etc/init.d/apache2 reload
于是乎就报上面的错了。这个问题的主要原因是没有定义ServerName,也就是没有定义默认的ServerName
5、到etc目录下建立一个hosts文件,内容为:127.0.0.1 localhost
6、回到apache2的目录,/etc/apache2/ ,打开httpd.conf,加上一行 ServerName 127.0.0.1 或者是你的服务器对应的IP地址
OK,再运行 /etc/init.d/apache2 reload ,不报错了吧。。
【备注】手工安装lamp的朋友可以看这里:http://hi.baidu.com/javatown/blog/item/c870547e956eb63d0dd7da3c.html
Tags: a2ensite
苹果相关 | 评论:0
| 阅读:21458
Submitted by gouki on 2009, December 23, 3:30 PM
这个消息来自于apple4.us,原文网址为:http://apple4.us/2009/12/apples-myriad-javascript-frameworks.html
看到这个我也很吃惊,吃惊的不是他用框架,而是一家公司,出了四五个JS框架。。累不累啊?
本来我也想转载过来,但apple4.us认为:
XML/HTML代码
- 在中国,用 CC 协议保护一个努力进行原创和组织有价值的 UGC 的博客媒体似乎相当困难
- 而且还提到:
- 转载有两个结果:一、浪费硬盘空间;二、令各个站点的内容趋向同质。两个都不是好结果。硬盘空间是一种资源,是资源就不该浪费;关于第二点,我们猜测没有人愿意在所有苹果站上看到大同小异的内容。
-
- 因此,在apple4.js页面底部就有:请勿转载本站文章。Apple4.us 保留一切权利。(声明)
所以我就不全部转载,只贴一点点,也就是这5个框架的名称和介绍:
MobileMe 团队使用 SproutCore。曾公开宣传过,目标是桌面级网页应用。主要竞争对手:Cappuccino(在我看来 SproutCore 的瑰宝是数据储存层,据我所知还没有对手能超过它。)
苹 果零售店使用 Gianduia。还未公开,但你可以在苹果一对一(One to One)的演示中看到(需要购买一台新麦金塔 + 一份合约)或通过限时的假日预定系统。我曾在 Twitter 上说过,Gianduia 的目标是桌面级网页程序,在这点上它像 SproutCore。
TuneKit 是一个小型框架,目的是 iTunes 内的 WebKit,已公开。由 iTunes team 发布。
Coherent 由 Dashcode 3 开发者工具小组创建。
PastryKit 是苹果内部的一个框架,致力于在 WebKit 下提供 iPhone 风格的用户界面。iPhone 团队使用
APPLE4。US原文中提到,这是一篇译文的内容,而且只是部分,因此,要看全篇还是请去apple4.us吧。
图片附件(缩略图):
Misc | 评论:3
| 阅读:18211
Submitted by gouki on 2009, December 22, 11:36 AM
作为一个jQuery的发烧友,对于jQuery1.4版本的新闻十分的关心,刚刚收到消息,jQuery1.4α2版本已经发布了。下面是我从 jQuery官方博客获得的消息: jQuery1.4 Alpha 2已经发布啦!这是jQuery1.4的第二个Alpha测试版本(第一版的发布链接),这个版本的代码是稳定的(并且在所有市面上流行的浏览器中通过了 测试) 获取jQuery1.4 α2版本:
未压缩版本:http://code.jquery.com/jquery-1.4a2.js
压缩版本:http://code.jquery.com/jquery-1.4a2.min.js
注意:如果您使用jQuery1.4 Alpha2版本,并且遇到了bug,请使用未压缩版本,它可以更加简单的找到错误的代码所在的位置。 目前所知道1.4版本的功能上相对版本 1.3.2进行了一些扩展,包括:
1.live 方法被大幅度检修,现在支持提交,更改,mouseenter,mouseleave,焦点,模糊在所有浏览器活动。现在还支持背景和数据。
2.append, prepend 方法优化
3.add has been adjusted to always return elements in document order.
4.find, empty, remove, addClass, removeClass, hasClass, attr, and css 等方法进行了重构,大大的优化
新闻来源:http://www.cnbeta.com/articles/100407.htm
Javascript | 评论:0
| 阅读:17462
Submitted by gouki on 2009, December 22, 10:37 AM
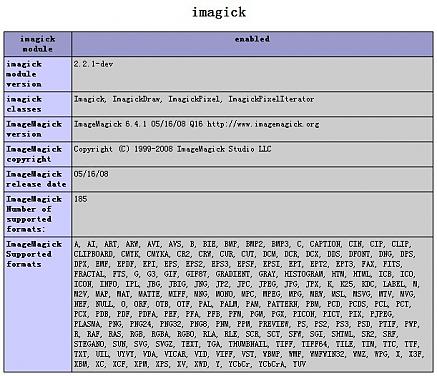
前两天有朋友在网站上提出Fastcgi模式下无法安装 imagick,我还以为是版本不对或者是其他什么原因。在这位朋友发邮件给我后,我才知道,原来问题如下:
我的平台是:windows 2008 (32bit)iis7 + php 5.2.12(FastCGI 模式) 想让php支持功能强大的 imageick
可是很抱歉,GOOGLE查询,翻阅了大量资料一直都搞不定。在一次命令模式下输入 php 提示找不到 php5ts.dll。
这下我算有思路了,FastCGI模式调用的是php5.dll,而ISAPI模式加载PHP php5ts.dll,为了验证我的怀疑,我卸载了我的PHP FastCGI,重新用ISAPI模式加载PHP,再按照网上的方法来做一次,重启IIS后,结果出来了!
这个结果让我十分困惑,难道FastCGI模式加载PHP,不能让imageick工作吗??
也许这个就是nts(非安全线程)跟ts(安全线程)区别吧(区别可以看这里 http://www.juyo.org/juyo/original/php-Thread-Safe/ 或者自己GOOGLE一下)。
知道的朋友欢迎跟我讨论:taihom(at)163.com

另外我在这个网站找到了解决方案:http://valokuva.org/?page_id=50
这个博客的Mikko,提供了在FastCGI 的 PHP 5.3.x,可以跑成功。
----以上文章来自http://zone.molihua.net/space.php?uid=99&do=blog&id=4473
而他提到的解决方案的内容页为:
Imagick Windows Builds
Hello,
The new build page http://valokuva.org/magick
The installation steps should be somewhat like the following:
1. Install ImageMagick from http://imagemagick.org/script/binary-releases.php#windows. Choose Win32 dynamic at 16 bits-per-pixel. During the installation choose “Add to system path” or add the dir manually to your PATH.
2. Download php_imagick.dll from PHP 5.3 Windows builds and put it into your extension_dir. ts means thread-safe and nts is non-thread-safe. The latter is usually used with FastCGI.
3. Voila! You should now see imagick in phpinfo. If not, let me know.
--EOF-
可以从:http://valokuva.org/magick/ 直接进行下载。。
感觉他提供的并非独立版本。。。
PHP | 评论:0
| 阅读:21866
Submitted by gouki on 2009, December 21, 5:11 PM
看这个名字就知道这个linux很小。事实上,也只有10M左右。不过我看中的是他的小,如果做分发软件那就爽了。。。给别人一虚拟机,然后啥也不提供。。。。就让他们自己使用我的软件。随便想想而己。。。
主要是yii的框架用的就是这种技巧,所以我也想学学。。
新闻来源:开源中国社区
Tiny Core Linux是一份很小(10 MB)的最低限度Linux桌面。它基于Linux 2.6内核、Busybox、Tiny X、FLTK图形用户界面、JWM窗口管理器,全部运行在内存中。它并非一份完整的桌面,也不完整支持所有的硬件;它只代表能引导进入一份最小X窗口桌面 所需的核心内容,典型情况下可包含对有线网络的访问。这份最小桌面可以通过从在线软件仓库安装额外应用软件来进行扩展。
Tiny Core Linux是一份很小(10 MB)的最低限度Linux桌面。它基于Linux 2.6内核、Busybox、Tiny X、FLTK图形用户界面、JWM窗口管理器,全部运行在内存中。它并非一份完整的桌面,也不完整支持所有的硬件;它只代表能引导进入一份最小X窗口桌面 所需的核心内容,典型情况下可包含对有线网络的访问。这份最小桌面可以通过从在线软件仓库安装额外应用软件来进行扩展。
Change log for v2.7:
* Updated appbrowser - single 'Install' button and renamed 'Download Only' to 'OnDemand'
* Updated appsaudit - new menu option 'Install Options' to maintain copy2fs.flg and copy2fs.lst
* New ondemand - create flwm right click menu shortcuts to load and start applications from /tce/optional - tune your system for much faster boot times.
* Updated tce-load - dropped l,m,lm,ml testing, ldconfig always called, depmod based on /usr/local/lib/modules, dropped -r option
* Renamed tcz2ram.flg, tcz2ram.lst to copy2fs.flg and copy2fs.lst, use flag for all, or list to specify extensions to be copied into filesystem.
* New 'ab' a tiny appbrowser in shell
* New cache-clear script.
* New boot code xvesa=WxHxD, e.g. xvesa=800x600x32 to set default Xvesa resolution bypassing xsetup
* Updated tce-update and tce-setup to implement an 'easy mode' to update extensions in your tce folder
* Updated tce-update feature enhancement for nfs support (Thanks to Gerald Clark)
* Updated rebuildfstab for block major 11 devices
* Updated udev/rules.d/75-cd-dvd.rules for sr[0-9] devices.
* Updated exitcheck.sh to call /opt/shutdown.sh for user shutdown commands.
* Removed mbchk and libpopt* as unneeded in base.
* Stripped more libs for smaller size, now at 10.1MB
下载地址:tinycore_2.7.iso (10.1MB, MD5).
目前正在准备vmware安装中,新闻来源:http://www.cnbeta.com/articles/100458.htm
------
安装完了,感觉还是和那种 floopy linux差不多的感觉 。简单的用用还行,不能做什么大的应用。哎。。。
苹果相关 | 评论:0
| 阅读:18878


