在windows下面有N多文件比较工具,很多时间我们都用了beyondcompare,在linux下面也有很多命令行的工具,苹果下面用什么呢?
我问了一下google,果然他就给了我答案:diffmerge
嗯。因为他是免费的。。。
官网地址:http://www.sourcegear.com/diffmerge/index.html
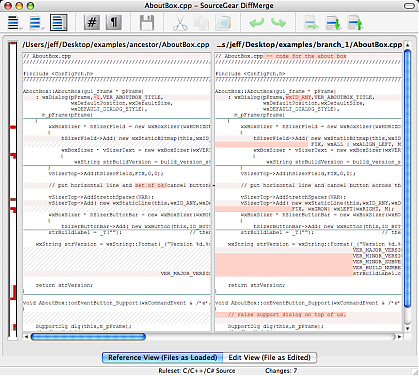
既支持文件、目录比较。也支持合并。其实不要太复杂,就足够了。
用下来好象对UTF-8的支持一般般。。但代码主体不是UTF-8的。已经很满足了

 膘叔的简单人生 , 腾讯云RDS购买 | 超便宜的Vultr , 免费部署 N8N 的 Zeabur
注册 | 登陆
膘叔的简单人生 , 腾讯云RDS购买 | 超便宜的Vultr , 免费部署 N8N 的 Zeabur
注册 | 登陆
浏览模式: 标准 | 列表分类:Flutter
免费而又强大的文件比较工具:DiffMerge
Submitted by gouki on 2011, September 11, 9:38 AM
MAC的快捷键
Submitted by gouki on 2011, September 8, 12:31 PM
尝试用mac的时候,有些都不太习惯。比如切换输入法,是command+space,而在windows下,是ctrl+space。
比如关闭窗口,是ctrl+w,而mac是command+w,退出程序还好。几乎都是command+q。这个倒习惯了
最大的不习惯是在写代码的时候,突然发现。。。没有home键和end键了。以前靠这个来快速定位到首部和尾部的。。。一下子纠结了。找了点资料才发现,原来是fn+left和fn+right可以当成home和end用。所以。。。猜测了一下delete的功能是通过fn+delete实现,结果,果然如此。。。默认的delete其实就是win键盘上的Backspace。。。慢慢慢慢就习惯了很多
找到一篇文章介绍快捷键的,备份一下:http://www.diybl.com/course/6_system/apple/200861/119083.html
在以下的列表中,「opt」为键盘上「Option键」的简称、「cmd」是「Command键」、 「ctrl」则是「Control键」的简称。作者表示所有按键都经过实验,但译者并没有亲自使用过所有的按键组合,所以本文内容仅供参考;如果您要尝试 没有使用过的按键组合,请自己小心。
一、开机时按下……
滑鼠按键 弹出抽取式媒介(2.4f1版以前的Boot ROM可能不包括退出CD片)
opt键 在配备「New World」韧体系统的机种上叫出「Open Firmware」开机系统选择功能。
cmd-opt键 按住这两个键,直到电脑发出二次声响,就会改以Mac OS 9开机。
cmd-x(有时只按住x键) 如果Mac OS 9和Mac OS X在同一个开机用的硬碟区段(partition)上,按这个键会强迫以OS X开机。
cmd-opt-shift-delete 跳过原定的启动磁碟,改以外接磁碟(或光碟机)开机。这个按键的主要作用,其实是强迫电脑不要从预设的启动磁碟读入系统档案,所以会产生从其他磁碟开机的 「副作用」。如果您的Mac是配备SCSI介面的机种,它会从编号(ID)最高的磁碟机往下搜寻,直到找出可以开机的磁碟区段为止。至於在配备IDE介面 的机种上则不确定它的搜寻顺序。
cmd-opt-shift-delete-# 从指定ID的SCSI磁碟开?#代表SCSI编号)。
cmd-opt-p-r 清除系统参数记忆体(PRAM),必须按住不放,等发出两次响声之后再放开。
cmd-opt-n-v 清除NV RAM,类似在Open Firmware中做「重置全部」(reset-all)的动作。
cmd-opt-o-f 开机时进入open firmware。
cmd-opt-t-v 强制Quadra AV机种使用外接电视机当作显示器。
cmd-opt-x-o 以唯读记忆体中所烧录的系统软体开机(仅适用於Mac Classic机种)。
cmd-opt-a-v 强制电脑辨识苹果AV显示器。
c 使用光碟开机。如果原先设定由OS X开机,但光碟机里没有放置开机光碟,则可能会改由OS 9开机。
d 强制以内建磁碟机开机。
n 按住n键直到萤幕上出现Mac标志,电脑会尝试透过BOOTP或TFTP以网路伺服器开机。
r 强制PowerBook重置萤幕设定。
t 强制配备FireWire介面的机种进入外接磁碟模式(FireWire Target Disk mode)。
shift 关闭所有延伸功能(OS 9或OS X之下的Classic环境)。
shift 关闭登入项目,同时也会关闭所有不必要的程式核心(kernel)延伸功能(也就是所谓安全开机模式,仅适用OS X 10.1.3或更新的系统版本)。
cmd 开机时关闭虚拟记忆体(Virtual Memory,仅适用OS 9或OS X之下的Classic环境)。
空白键 开机时启动延伸功能管理程式(OS 9或OS X之下的Classic环境)。
cmd-v 开机过程中显示控制台讯息(仅适用OS X)。
cmd-s 开机后进入单一使用者模式(仅适用OS X)。
cmd-opt-c-i 先将系统时钟设定为日期1989年9月20日,然后以这个按键组合开机,就可以看到萤幕上显示特殊的系统小秘密(仅适用於Mac IIci机种)。
cmd-opt-f-x 先将系统时钟设定为日期1990年3月19日,然后以这个按键组合开机,就可以看到萤幕上显示特殊的系统小秘密(仅适用於Mac IIfx机种)。
二、萤幕上出现小Mac笑脸时按下……
空白键 开机时启动延伸功能管理程式(OS 9或OS X之下的Classic环境)。
shift 关闭包括MacsBug(一种程式设计师工具程式)在内的所有延伸功能(OS 9或OS X之下的Classic环境)。
shift-opt 关闭除了MacsBug之外的所有延伸功能(OS 9或OS X之下的Classic环境)。
ctrl 中断开机过程,进入MacsBug除错模式。
三、系统画面出现后按下……
cmd-opt 当OS 9或OS X中的Classic环境连接磁碟机时,可以重建磁碟机的桌面档案。
opt 不要开启任何系统视窗(Mac OS 9)。
shift 在系统档案(Finder)启动时暂时不要开启系统视窗。这些视窗并没有被真的关闭,只要您重新开机,这些视窗都就会照常出现(Mac OS X)。
shift 不要执行任何「启动项目」软体(Mac OS 9)。
四、在系统画面中按下……
按住opt键,再以滑鼠游标
按视窗上的关闭方块 关闭所有的系统视窗(除了弹出式视窗之外);按cmd-opt-w键也可以获得一样的效果。
cmd-shift-opt-w 关闭所有的系统视窗(包括弹出式视窗)。
cmd-右箭头键 在档案视窗以列表模式显示时,开启一个档案夹。
cmd-opt-右箭头键 在档案视窗以列表模式显示时,重复开启档案夹、以及其下所包含的多层档案夹。
cmd-左箭头键 在档案视窗以列表模式显示时,关闭一个档案夹。
cmd-opt-左箭头键 在档案视窗以列表模式显示时,重复关闭档案夹、以及其下所包含的多层档案夹。
cmd-上箭头键 开启上一层档案夹。在Mac OS X中,如果事先并未选定档案夹、而且没有开启任何视窗,这个按键会开启现在使用者的专属目录。
cmd-opt-上箭头键 开启上一层档案夹,并关闭现用档案夹。
cmd-opt-shift-上箭头键 将桌面变成现用视窗,并且选择最上层磁碟机。
cmd-下箭头键 开启选取的项目。在Mac OS X中,如果事先并未选定档案夹、而且没有开启任何视窗,这个按键会开启桌面档案夹。
cmd-opt-下箭头键 开启选取的项目,并关闭现用的档案夹。
opt-滑鼠按键 按条列档案视窗中的小三角形图像时,可以显示或隐藏下层档案夹中的内容。
tab键 选择名称以下一个英文字母开头的档案夹。
shift-tab键 选择名称以上一个英文字母开头的档案夹。
cmd-delete 把选取的项目搬进垃圾桶
五、在系统画面中的「视窗」选单中……
cmd-选取项目 关闭视窗。
cmd-shift-选取项目 将弹出式视窗归位。
cmd-opt-选取项目 展开选取的视窗,并关闭其他所有视窗。
ctrl-选取项目 展开选取的视窗,并隐藏其他视窗的内容。
·ctrl-opt-选取项目 启动选取视窗,并展开所有的其他视窗。
六、系统启动完毕之后……
在有电源按钮的机种上
电源按钮 在萤幕上显示包括「关机」、「睡眠」、以及「重新开机」按钮的对话框(请参阅下一节)。
cmd-ctrl-电源按钮 强制重新开机。这种方式非必要不建议使用,因为有可能损坏磁碟上的资料内容。
ctrl-cmd-opt-电源按钮 快速关机。
cmd- 电源按钮 启动程式除错软体(如果已事先安装的话)。较早期的Mac(例如Mac II时代的机器)需要先安装由Paul Mercer所写的除错延伸功能(debugger init)来使用这个功能;不过这个功能在配备68040处理器的Mac机种上,已经成为系统韧体内容的一部份。
cmd-opt-电源按钮 让后期型式的PowerBook和桌上型Mac进入睡眠状态。
cmd-opt-ctrl-电源按钮 重新设定电源管理程式(Power Manager;仅适用PowerBook 500系列)。
shift-fn-ctrl-电源按钮 重新设定电源管理程式(Power Manager;仅适用PowerBook G3与G4系列)。
-------------
以上内容不可全信,因为到lion的时候,很多快捷键都换掉了。一些界面、常见操作都和雪豹不太一样了啦
最后再附上一年所谓的隐藏快捷键:http://jaylan.anyday.com.tw/?p=212
以下是For Mac OSX用的快速鍵
1. Apple Logo
快速鍵 : Option-Shift-K
2. Zero Brightness~馬上把螢幕亮度切至無亮度
快速鍵 : Control-Shift-Eject
Note. Instantly turn your display off without logging out from the system.
3. Adjust Volume Bar~微調音量,可將原本一格的音量調整再細分為四等份,作四分之一的微調
快速鍵 : Option-Shift-F4 / Option-Shift-F5
Note. Increase/decrease your volume bar by a quarter each time it’s invoked. This is particularly useful for fine tuning Mac with bombastic sound system.
4. Double Buffer~Control-K可剪下游標後方的整段文字(不需反白),Control-Y可將用Control-K剪下的文字貼上,類似Copy & Paste的功能
快速鍵 : Control-K (Kill) and Control-Y (Yank)
Note. Like, Cut and Paste, combination of Kill and Yank can help you organize your text easily. Cut followed by Kill grants you double text buffer.
5. Home and End~將游標移至文章的首字及尾字
快速鍵 : Control-A (Home) and Control-E (End)
Note. This is pretty much the substitution for Windows button HOME and END. Pressing Command-← or Command-→ performs the same action.
6. Delete and Backspace~就是Delete 跟 Backspace的快速鍵,這個Delete(Control-D)的快速鍵筆使用筆電時可按的fn+delete好按得多
快速鍵 : Control-D (Delete) and Control-H (Backspace)
Note. In Windows, we’ve got two buttons for this : DEL and BACKSPACE. You can use Fn-Delete to perform forward deletion while the button Delete acts as Backspace.
7. Related Messages~在Mail裡使用的快速鍵~方便回信時用
快速鍵 : Command-Shift-K
Note. Selects all related messages in the same mailbox.
8. Open Address in New Tab~在新分頁中開啟網址
快速鍵 : Command-Enter
Note. While highlighting address bar, pressing this shortcut will bring up new tab of that selected address.
9. Google Search Box~在Safari與Firefox瀏覽器中可將游標快速移至搜尋bar中(按Command-L是前往網址列)
快速鍵 : Command-Option-F
Note. Quickly jumps your cursor to Google Search Box. Saving your mouse click as well as your precious ticks of seconds.
10. Zoom~放大或縮小螢幕的功能(也可利用Control+滑鼠滾輪,但需要在偏好設定中開啟此功能)
快速鍵 : Command-Option-[+] (Zoom In) or Command-Option-[-] (Zoom Out)
Note. Zoom in/out your display; making tiny objects looks huge.
轉載原文於此:Unveiling 10 Hidden OS X Shortcuts
-----EOF-----
其实第一个输入苹果的快捷键真的挺好玩。。。
苹果电脑MAC OS X安装和删除程序的方法
Submitted by gouki on 2011, September 6, 10:32 PM
刚开始用mac,对于添加删除程序还是不太习惯。毕竟那种windows下的注册表之类的概念已经不在了。
不过,装软件还是很方便啦。
如果是dmg的软件,直接双击就OK了。如果不是,是其他的,一般来说,解压缩后,COPY到Application目录下也就OK了。
删除程序的话,就有点纠结了。
Mac OS X下的程序,通常不像Windows电脑下的那么复杂,什么注册表,DLL什么的,完全不用考虑。
要删除一个电脑程序之前,我先说一下安装一个程序后,通常生成了什么文件。
首先,正常情况下,是在“应用程序”(Applications)文件夹中,这是程序的主文件。当然,也可能放在其他地方,但是默认都是放在这里面的。
其次,就是程序的配置文件了,一般是”.plist”为扩展名的文件,都是放在”~/Library/Preferences/”中。
再次,就是程序的数据文件了,和图像有关的,可能放在”图片”(~/Pictures)中,其他的可能会在”文稿”(~/Documents)中。
这里不排除一些比较特殊的情况,具体问题具体分析了。
现在说说苹果电脑MACOSX下怎么删除软件。
先用菜单右上角的spotlight来搜索。比如我装的vmware fusion,我想要删除,我就直接去Application目录下把vmware fusion拖到废纸瘘里。但为了以防万一,我还是用spotlight搜索一下vmware,除了找到一些vmdk的文件,其他就找不到了。所以我就认为它已经从系统里消失了。
当然,还是会有一些专业的软件的,毕竟有的程序自带解载程序,运行就可以了,再有,就是给大家推荐个解载用的程序,AppZapper用这个程序可以很干净,很方便的清除要删除的程序,只要把程序文件托拽到它的图标上,再点清除就可以了。
NSLog 输出格式
Submitted by gouki on 2011, August 24, 3:11 PM
NSLog是IOS上面常用的做记录的方式,感觉有点象是php中的printf,因为常用,所以就记录了一下。
%@ 对象
• %d, %i 整数
• %u 无符整形
• %f 浮点/双字
• %x, %X 二进制整数
• %o 八进制整数
• %zu size_t
• %p 指针
• %e 浮点/双字 (科学计算)
• %g 浮点/双字
• %s C 字符串
• %.*s Pascal字符串
• %c 字符
• %C unichar
• %lld 64位长整数(long long)
• %llu 无符64位长整数
• %Lf 64位双字
反正纠结纠结就当printf了。也就@用的最多一点吧
苹果官方:Introduction to WebKit DOM Programming Topics
Submitted by gouki on 2011, August 13, 12:41 AM
这是一篇来自苹果官方的教程,原来我也没想到过,居然可以用JS来调用Object-C中的东东。其实想想,这应该是可以,要知道,象maxthon这些浏览器,可就是早就能够调用他们的核心组件了,当然,也是用JS的。firefox也是类似。。。所以Safari应该也是可以支持的。
官方文章地址是:http://developer.apple.com/library/mac/#documentation/AppleApplications/Conceptual/SafariJSProgTopics/WebKitJavaScript.html
看看他们是怎么写的,
Important: This is a preliminary document. Although it has been reviewed for technical accuracy, it is not final. Apple is supplying this information to help you adopt the technologies and programming interfaces described herein. This information is subject to change, and software implemented according to this document should be vetted against final documentation. For information about updates to this and other developer documentation, you can check the ADC Reference Library Revision List. To receive notification of documentation updates, you can sign up for a free Apple Developer Connection Online membership and receive the bi-weekly ADC News e-mail newsletter. See http://developer.apple.com/products/for more details about ADC membership.)
还有。。。
Who Should Read This Document?
This document is designed for a number of different audiences:
-
If you are a web content developer—developing web sites and embedded JavaScript applications—you should read about Safari’s JavaScript support and how scripts operate within WebKit-based applications.
-
If you are a Cocoa and WebKit developer, you should read about how to integrate JavaScript into your WebKit views and how to enhance your user experience in doing so.
-
If you are a Dashboard developer, you should read about integrating JavaScript into your widgets to provide a better user experience and more advanced features to your users.
Organization of This Document
The topic contains the following articles:
-
“About JavaScript and the DOM” describes the JavaScript language and its implementation in Safari and WebKit.
-
“Using the Document Object Model From JavaScript” discusses the Document Object Model and how to use it from JavaScript.
-
“Using the Canvas” describes the canvas object, a critical part of Dashboard but also useful within other WebKit applications.
-
“Using the Pasteboard From JavaScript” describes how to implement copy and paste functionality within embedded JavaScript applications.
-
“Using Drag and Drop From JavaScript” describes how to use Mac OS X drag and drop functionality from within Safari and WebKit windows.
-
“Using XMLHttpRequest Objects” describes how to request data from network resources using the
XMLHttpRequestobject. -
“Calling Objective-C Methods From JavaScript” describes how to use Objective-C in the JavaScript scripting environment, either within a WebKit object or by using a custom browser plug-in.
See Also
-
Safari HTML Reference provides descriptions of HTML tags, attributes, and other markup.
-
Safari CSS Reference provides descriptions of CSS properties and constants.
-
Safari Web Content Guide provides information about designing web content for iPhone.
-
Dashboard Programming Topics provides information on the technologies available to you when creating a Dashboard widget. Additional Dashboard documents and sample code can be found in the Reference Library > Apple Applications > Dashboard.
-
Apple JavaScript Coding Guidelines provides general tips about the JavaScript programming language.
-
The Reference Library > Apple Applications > Safari section of the ADC Reference Library provides useful information on WebKit, the technology that provides Apple’s JavaScript runtime.
果然还是官方的资料最多,NND,平时搜点资料都搜不到,还是官方给的方案最多啊。
| « 2026年07月 » | ||||||
| 日 | 一 | 二 | 三 | 四 | 五 | 六 |
|---|---|---|---|---|---|---|
| 1 | 2 | 3 | 4 | |||
| 5 | 6 | 7 | 8 | 9 | 10 | 11 |
| 12 | 13 | 14 | 15 | 16 | 17 | 18 |
| 19 | 20 | 21 | 22 | 23 | 24 | 25 |
| 26 | 27 | 28 | 29 | 30 | 31 | |
日志分类
- PHP [668]
- python [0]
- Go [9]
- Flutter [227]
- lua [0]
- Scala & Ruby [92]
- Javascript [307]
- PHP Framework [65]
- Linux [5]
- 苹果相关 [286]
- DataBase [0]
- Software [236]
- Literature [9]
- Ideas [27]
- 產品 [14]
- Misc [981]
- Baby [161]
热门标签
-
mysql
php
jquery
yii
ubuntu
google
linux
javascript
firefox
肖佑阳
framework
phpstorm
database
mac
thinkphp
svn
apache
zend
typecho
wordpress
qq
连载
seo
chrome
优化
ipad
netbeans
ios
css
架构
日志归档
搜索文章
最新评论
- 前几年 lnmp.org 被收购,搞了一波投毒之后,我对这种一键...
06-03 - imlonghao - 这是默认主题啊,怎么分享
10-18 - gouki - 请问这个主题可以分享一下么 谢谢
10-14 - NN - 大佬你好,在用dcat 遇到 怎么做无感刷新的问题,请问你有做过...
02-01 - uc5bbl8s - 好用!!
07-14 - 口水
博客信息
- 分类数量: 17
- 文章数量: 3152
- 评论数量: 1906
- 标签数量: 2284
- 附件数量: 941
- 注册用户: 56
- 今日访问: 21410
- 总访问量: 75176474
- 程序版本: 1.6
