说来奇怪,我在前期写过一篇文章,说WPS的pdf查看是鸡肋一般的功能: 鸡肋一般的wps插件:PDF查看 ,然而,今天我却觉得他有用了。。。
缘由是我打开一个PDF文件,用的是福昕,结果,打印按钮显示的是灰色的。用了adobe reader也是如此,我在想不到该如何做的情况下,尝试用WPS打开它,结果发现打印也是灰色的。本想着泪奔而走的,忽然发现,在插件栏上的打印按钮居然可以点,而且上点了之后确实可以打印。。。泪流满面啊【套用:内牛满面】。。
截图如下: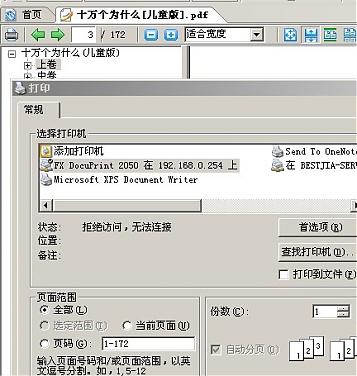
如果你有WPS,在无法打印的情况,可以尝试一下哦。
步骤如下:
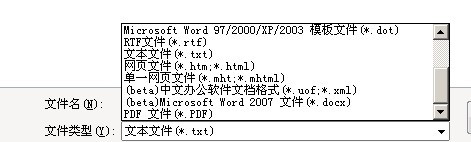
1、打开WPS文字,在打开界面中把文件类型改为PDF,否则,是看不到PDF文件的。
2、然后就可以操作了。
如果你没有PDF插件,可以打开工具栏: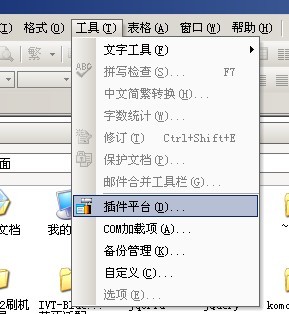
选择PDF插件进行加载: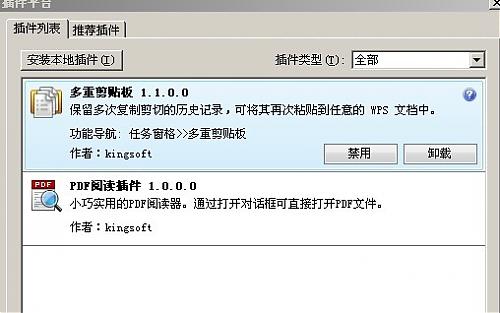
然后你就可以 重复上面的步骤1、2了
OK,完成这件事后,是不是很开心啊?
公司内部禁用了一堆端口...唉...SSH连不上去
不得不换端口...
第一种:
01假如要改SSH的默认端口(22),那么你只要修改:/etc/ssh/sshd_config中Port 22,这里把22改成自己要设的端口就行了,不过千万别设和现已有的端口相同哦,以防造成未知后果。
02假如要限制SSH登陆的IP,那么可以如下做:
先:修改/etc/hosts.deny,在其中加入sshd:ALL
然后:修改:/etc/hosts.allow,在其中进行如下设置:sshd:192.168.0.241
这样就可以限制只有192.168.0.241的IP通过SSH登陆上LINUX机器了。
第二种:
首先修改配置文件
vi /etc/ssh/sshd_config
找到#Port 22一段,这里是标识默认使用22端口,修改为如下:
Port 22
Port 50000
然后保存退出
执行/etc/init.d/sshd restart
这样SSH端口将同时工作与22和50000上。
现在编辑防火墙配置:vi /etc/sysconfig/iptables
启用50000端口。
执行/etc/init.d/iptables restart
现在请使用ssh工具连接50000端口,来测试是否成功。如果连接成功了,则再次编辑sshd_config的设置,将里边的Port22删除,即可。
之所以先设置成两个端口,测试成功后再关闭一个端口,是为了方式在修改conf的过程中,万一出现掉线、断网、误操作等未知情况时候,还能通过另外一个端口连接上去调试以免发生连接不上必须派人去机房,导致问题更加复杂麻烦。
来源:http://if.vc/
仍然是quickstart的内容之一:create project
Create Your Project
In order to create your project, you must first install Zend Framework.
为了创建您的ZF项目,你必须先安装ZF框架
Install Zend Framework
The easiest way to get Zend Framework along with a complete PHP stack is by installing Zend Server. Zend Server has native installers for Mac OSX, Windows, Fedora Core, and Ubuntu, as well as a universal installation package compatible with most Linux distributions.
最简单安装ZF的方法就是安装ZendServer,ZendServer可以安装在苹果系统,windows, fedora,ubuntu,而且支持大多数的linux操作系统 。
After you have installed Zend Server, the Framework files may be found under /Applications/ZendServer/share/ZendFramework on Mac OSX, C:\Program Files\Zend\ZendServer\share\ZendFramework on Windows, and /usr/local/zend/share/ZendFramework on Linux. The include_path will already be configured to include Zend Framework.
在你安装完zendserver后,如果您是使用MAC系统,你将在/Applications/ZendServer/share/ZendFramework目录下找到框架文件,windows平台的话,是在, C:\Program Files\Zend\ZendServer\share\ZendFramework目录中,而linux平台则在/usr/local/zend/share/ZendFramework目录中。同时include_path也已经被配置好支持ZF框架了。
Alternately, you can download the latest version of Zend Framework and extract the contents; make a note of where you have done so.
当然你也可以直接下载ZF的最新版本并解压到你想使用的目录中
Optionally, you can add the path to the library/ subdirectory of the archive to your php.ini's include_path setting.
或者,你也可以把library这个目录加载到你的php.ini中的include_path设置中。
That's it! Zend Framework is now installed and ready to use.
这时候,ZF框架就已经被安装好并能够被使用了。
zf Command Line Tool ZF命令行工具
- In your Zend Framework installation is a bin/ subdirectory, containing the scripts zf.sh and zf.bat for Unix-based and Windows-based users, respectively. Make a note of the absolute path to this script.
- 在你的ZF安装目录下,有两个可执行文件:zf.sh和zf.bat,他们分别对应着Unix平台和windows平台。记录下这个文件的绝对路径
-
- Wherever you see references to zf.sh or zf.bat, please substitute the absolute path to the script. On unix-like systems, you may want to use your shell's alias functionality: alias zf.sh=path/to/ZendFramework/bin/zf.sh.
- 当你想要引用这zf.sh或者zf.bat文件 的时候,请先设置它的详细路径。例如在Unix平台下,你可以使用shell功能来进行替代:alias zf.sh=path/to/ZendFramework/bin/zf.sh
-
- If you have problems setting up the zf command-line tool, please refer to the manual.
- 如果你还对ZF命令行工具有疑问,那就只能查看官方的手册了
Open a terminal (in Windows, Start -> Run, and then use "cmd"). Navigate to a directory where you would like to start a project. Then, use the path to the appropriate script, and execute one of the following:
打开终端(在windows下面为:开始->运行->输入cmd),转到你想要创建项目的子目录中,开始就可以开始使用你刚才设置的路径来运行那两个script之一了。
XML/HTML代码
- # Unix:
- % zf.sh create project quickstart
-
- # DOS/Windows:
- C:> zf.bat create project quickstart
Running this command will create your basic site structure, including your initial controllers and views. The tree looks like the following:
运行了这个命令,你将会得到ZF框架的项目的最基本结构,包含了初始化后的控制和和视图(controllers and vews),这个树形结构类似如下:
XML/HTML代码
- quickstart
- |-- application
- | |-- Bootstrap.php
- | |-- configs
- | | `-- application.ini
- | |-- controllers
- | | |-- ErrorController.php
- | | `-- IndexController.php
- | |-- models
- | `-- views
- | |-- helpers
- | `-- scripts
- | |-- error
- | | `-- error.phtml
- | `-- index
- | `-- index.phtml
- |-- library
- |-- public
- | `-- index.php
- `-- tests
- |-- application
- | `-- bootstrap.php
- |-- library
- | `-- bootstrap.php
- `-- phpunit.xml
At this point, if you haven't added Zend Framework to your include_path, we recommend either copying or symlinking it into your library/ directory. In either case, you'll want to either recursively copy or symlink the library/Zend/ directory of your Zend Framework installation into the library/ directory of your project. On unix-like systems, that would look like one of the following:
在这点中,如果你没有将ZF框架加入到你的 include_path ,我们推荐你将它 COPY或者 symlinking到你的 library目录下。两种方法其中都是将library/Zend 目录 链至你的项目。在unlx系统中,它大致是这样操作的:
XML/HTML代码
- # Symlink:
- % cd library; ln -s path/to/ZendFramework/library/Zend .
-
- # Copy:
- % cd library; cp -r path/to/ZendFramework/library/Zend .
On Windows systems, it may be easiest to do this from the Explorer.
在windows平台下,直接在资源管理器中就能够操作完毕。
Now that the project is created, the main artifacts to begin understanding are the bootstrap, configuration, action controllers, and views.
项目创建完毕后,the main artifact【不知道如何翻译】先了角解一下:bootstrap,configuration,action,controllers和views
The Bootstrap
Your Bootstrap class defines what resources and components to initialize. By default, Zend Framework's Front Controller is intialized, and it uses the application/controllers/ as the default directory in which to look for action controllers (more on that later). The class looks like the following:
Bootstrap类定义了资源和构成的初始化。默认情况下ZF只初始化了Front Controller【前端操作器】,它使用了 application/controllers 作为默认目录,在该目录里有着controller控制类的文件。bootstrap最初是这样的:
PHP代码
- class Bootstrap extends Zend_Application_Bootstrap_Bootstrap
- {
- }
As you can see, not much is necessary to begin with.
就你看到的内容来说,好象没有多少是必需的。
Configuration
While Zend Framework is itself configurationless, you often need to configure your application. The default configuration is placed in application/configs/application.ini, and contains some basic directives for setting your PHP environment (for instance, turning error reporting on and off), indicating the path to your bootstrap class (as well as its class name), and the path to your action controllers. It looks as follows:
ZF本身的配置是极少的,你通常需要为你自己的项目进行单独配置。默认的配置文件是/application/configs/application.ini,在文件中定义了一些PHP环境变量(如error_reporting的打开与否)和bootstrap类的路径(甚至是bootstrap类的名称),以前你的控制器的路径,内容如下:
XML/HTML代码
- ; application/configs/application.ini
-
- [production]
- phpSettings.display_startup_errors = 0
- phpSettings.display_errors = 0
- includePaths.library = APPLICATION_PATH "/../library"
- bootstrap.path = APPLICATION_PATH "/Bootstrap.php"
- bootstrap.class = "Bootstrap"
- resources.frontController.controllerDirectory = APPLICATION_PATH "/controllers"
-
- [staging : production]
-
- [testing : production]
- phpSettings.display_startup_errors = 1
- phpSettings.display_errors = 1
-
- [development : production]
- phpSettings.display_startup_errors = 1
- phpSettings.display_errors = 1
Several things about this file should be noted. First, when using INI-style configuration, you can reference constants directly and expand them;
APPLICATION_PATH is actually a constant. Additionally note that there are several sections defined: production, staging, testing, and development. The latter three inherit settings from the "production" environment. This is a useful way to organize configuration to ensure that appropriate settings are available in each stage of application development.
关于这个文件的必须要注意一些事。首先,当你使用ini格式的配置文件时,你可以直接引用常量,如APPLICATION_PATH就是一个常量。另外,还有一些选择器是默认定义过的:production,staging,testing和defelopment。后面三个设置都是从production的环境变量中扩展的。这样,你就可以很好的为你的项目开发进行适当的配置。
原文:http://framework.zend.com/docs/quickstart/create-your-project
有点长,写的也乱。先写这么多,下次补全。
其实不太想翻译这个,毕竟太初级了。。。我想翻译的是这个:http://devzone.zend.com/tag/PHP101
但是翻译现在这个QuickStart是可以让我在言语组织上学习点东西。先为我想翻译的东西打点基础吧。

